

This afternoon John and I helped to train 3 missionary couples who came here for some training. They are serving in France, Poland and Spain. All have recently arrived in their countries and will be working with WSR and humanitarian projects. It’s our hope that some of their experiences will turn into news stories, so we were asked to help them learn a bit more about writing and photography (that was my part).
John explained about getting permissions to use images or quotes. Then Sister Foye talked about what she needs for her Humanitarian newsletter (format stuff). Then I had about 45 min to teach about Writing News Articles and Photography.
These are the handouts I prepared for them:
Here is my best writing advice:
In the Church Communication Department, we have 3 responsibilities:
Increase positive awareness of the Church
Build bridges of friendship and understanding
Extend our reach
D&C 84: 60-62
60. Verily, verily, I say unto you who now hear my words, which are my voice, blessed are ye inasmuch as you receive these things;
61. For I will forgive you of your sins with this commandment—that you remain steadfast in your minds in solemnity and the spirit of prayer, in bearing testimony to all the world of those things which are communicated unto you.
62. Therefore, go ye into all the world; and unto whatsoever place ye cannot go ye shall send, that the testimony may go from you into all the world unto every creature.
So what is it we are to send? Our Stories, our Words!
Words are Powerful. We can use our words to fulfill our 3 responsibilities.
Think about things that are interesting to you. They will be interesting to others too.
Think about how you might tell about something in a simple article.
First you want to get their interest with an interesting photo or a title that makes them want to know more. Be creative. You can ask a question or you can use interesting words to get their attention.
After the title, you want to do your very best on the first part of the article, putting all the most important information first. The first paragraph, called “introduction” or “lead,” tells the main point of the story. It is critical and usually will determine whether a story is read. Keep it 30 words or less. You want them to want to know more.
As you write, remember to answer the questions: Who? What? Where? When? Why? Answer those questions as early in the article as you can.
Use friendly sentences, not technical or complicated ones. Make it feel conversational.
Don’t use “Mormon” words they won’t understand. (Example: use congregation instead of ward or meeting place instead of stake center).
Avoid stating an opinion. Just stay objective and open and welcoming.
An article should have one main point, or be about one event.
Be brief. Nobody wants to read a long story. Use photos or a short video clip to tell more of the story if you can. You can put information into the captions. We tend to write too much. Write a draft then shorten it!
Always remember who you are writing for—who is your audience? What would they want to know?
Keep paragraphs short—one or two sentences if you can.
Use the proper name of the Church the first time you use it.
It’s good to use direct quotes rather than what you think someone said.
In the end, you want someone to feel, “I’m glad I read that! I learned something new!”
Try to convey the feeling that “here is a gift for you to read,” given freely. I hope you like it.
A word on writing Drafts–
Always assume your first draft of an article will not be your last. Don’t be discouraged if you don’t like it. Your first draft is almost like a brainstorming session with your words. Just get them out, as best you can– in bullet points, in ideas, or sometimes in complete sentences, After you’ve put thoughts on paper, go back and start organizing them into the structure of an article. Do you have a lead idea? Do you have the Who, What When, Where, and Why, and points? Do you have any quotes from participants? Organize your ideas. Read them out loud to see how the words flow. Let someone else read them. Do they have questions that need to be clarified?
Remember that the more you write, the easier it gets. Practice writing about things in your journal. When I write a blog post, I usually write the story in my journal first, then turn a thought or experience into a blog post that’s written more like an essay, an article, a gift to the reader. That really helps me practice and improve my writing.
You can also practice by posting things on Facebook or social media. Post an interesting picture or photo from an activity and just say a few words about it. Notice who likes or comments on the things you post. See if anyone asks more questions. Pay attention to what’s interesting to others.
Others are interested in stories that are interesting, cultural or out of the ordinary. People like to see good things happening in the world (probably more than they think they want to see something religious). Show the world that we are normal people doing good things. Use your words and photos to show and celebrate the good you see in the world.

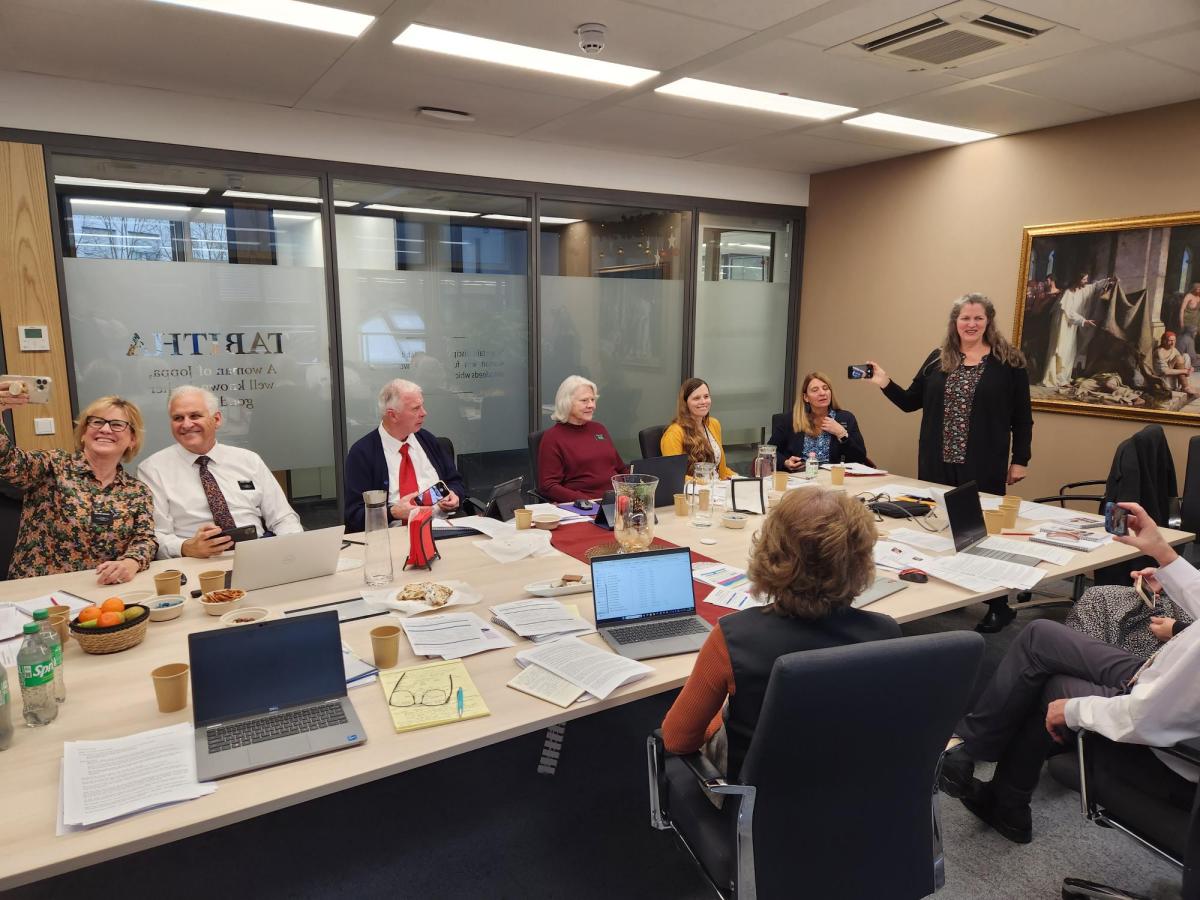
Next we talked about photography. In all of these pic you can see everyone practicing. I think they were most intrigued when I suggested they practice only using one had to take photos. I showed them how to hold their phones to make that possible.
Photography Tips for News Articles
We can use photographs to help tell our stories.
Horizontal photos are usually preferred (go wide, not tall).
Try hard to get photos of people interacting with other people.
Look around at what’s happening and find the interesting interaction points.
Let the background of the photo help tell the story.
(Shoot into the story, not away from it.)
We generally don’t want posed photos, or people lined up in front of a project. We want to see the project in action whenever possible, rather than missionaries proudly standing in front of a project. It’s not about YOU, it’s about THEM.
Always take SEVERAL photos. ONE PHOTO IS ALWAYS BETTER THAN ANOTHER. You might have a perfectly framed photo and think you only need to take one shot, then you later discover someone’s eyes were closed, or someone (maybe you) moved. Always take at least 2 photos in every situation, more if you are able. You can always eliminate the poor ones.
MOVE IN CLOSER!!
When you think you’re in the right place to take a photo, take 2 steps closer!
If you can’t move closer, use your zoom features.
You do not need to have lots of sky or space above the people in your photo. You do not need to include their whole bodies, head to toe. Move in closer and focus on their faces, not their entire bodies. Try to avoid posed pictures. Catch them at something they’re doing. Don’t take too long to take the photo–they’ll feel uneasy. Snap the photo quickly and take multiples. Learn to take photos with one hand.
Fill your frame with what is going on in the photo. It’s OK if things go off the edge. Our minds can imagine the rest of the photo.
A few general photos that give an overview of a project or event can help add context.
Practice, practice, practice. Evaluate your photos. Practice cropping photos you’ve already taken to see how you might make the photo better. With some practice, you will learn to crop the photos you take as you are taking them.
In today’s world, photos are FREE. Take them generously! Good luck capturing the perfect interactions and moments!


Using only one hand also makes it easy to take selfies.

Here’s an example of some pics I took while I was teaching them about MOVING IN CLOSER:


It was a really fun afternoon. I also prepared a handout on the differences between using the active and passive voice, but you’re probably not interested in that, so we’ll call it good here for now!
